


Table of contents
- Customizing Your Terminal Prompt
- Using Keyboard Shortcuts
- Creating Aliases
- Running Commands in the Background
- Using Pipes and Redirection
- Navigating Your Command History
- Using SSH to Connect to Remote Servers
- Using Screen and Tmux for Terminal Multiplexing
- Using Bash Scripting for Automation
- Using SSH Keys for Passwordless Logins
- Using Environment Variables
- Using Regular Expressions
- Using Shell Scripts for System Administration
- Using awk for Text Processing
- Using cron for Scheduled Tasks
- Using rsync for File Synchronization
- Using journalctl for System Logging
- Using scp for Secure File Copy
- Using sed for Text Transformations
- Using netstat for Network Monitoring
- Using htop for Process Monitoring
- Using Third-Party Tools for Terminal Productivity
Linux is a popular open-source operating system that is used by developers, IT professionals, and enthusiasts worldwide. One of the most powerful and flexible tools in Linux is the terminal, also known as the command line. The terminal allows users to interact with their Linux systems using text commands instead of a graphical user interface (GUI). While mastering the terminal can seem intimidating for beginners, learning some advanced tips and tricks can greatly increase your productivity and efficiency.
Customizing Your Terminal Prompt

Customizing your terminal prompt is a great way to make the terminal more personal and productive. In addition to displaying the username, hostname, and current working directory, you can add information such as the current time, battery status, and even weather information.
One way to customize your prompt is to use a pre-built prompt theme. There are many prompt themes available online, such as Powerline, Starship, and Oh My Zsh. These themes provide a lot of customization options, including colors, icons, and information displays.
Alternatively, you can create your own custom prompt by modifying the PS1 environment variable. The PS1 variable is a shell variable that determines the appearance of your prompt. For example, to add the current time to your prompt, you can use the following command:
export PS1='\[\e[36m\][\A]\[\e[m\] \[\e[32m\]\u@\h\[\e[m\]:\[\e[33;1m\]\w\[\e[m\] \$ '
This command sets the color to cyan, adds the current time in brackets, displays the username and hostname, and shows the current working directory.
Using Keyboard Shortcuts
Using keyboard shortcuts in the terminal can save you a lot of time and effort. Here are some additional keyboard shortcuts that you can use:
Ctrl + A: Move to the beginning of the line.Ctrl + B: Move one character back.Ctrl + C: Interrupt the current command.Ctrl + D: End the current terminal session.Ctrl + E: Move to the end of the line.Ctrl + F: Move one character forward.Ctrl + K: Delete the characters to the end of the line.Ctrl + L: Clear the screen.Ctrl + R: Search through command history.Ctrl + T: Swap the last two characters before the cursor.Ctrl + U: Delete the characters to the beginning of the line.Ctrl + W: Delete the word to the left of the cursor.Ctrl + Y: Paste the last deleted text.Ctrl + Z: Suspend the current command and put it in the background.
You can also create your own custom keyboard shortcuts using the bind command. For example, you can create a shortcut to clear the terminal screen using the command:
bind -x '"\C-l": clear'
This command binds the Ctrl + L keyboard shortcut to the clear command.
Creating Aliases
Aliases are a powerful way to save time and reduce typing. You can create aliases for long or complex commands, as well as for common misspellings. For example, you can create an alias for the ls command to include the -lh options:
alias ll='ls -lh'
This command creates an alias called ll that runs the ls -lh command. You can then use the ll command to list files in the current directory in a long format.
You can also create aliases that take arguments. For example, you can create an alias to search for files in the current directory that match a specific pattern:
alias findme='find . -name'
This command creates an alias called findme that takes an argument and runs the find . -name command. You can then use the findme command followed by the pattern you want to search for, such as:
findme '*.txt'
This command searches for all files with a .txt extension in the current directory and its subdirectories.
Running Commands in the Background
Running commands in the background can be useful when you need to run a long-running command and continue working in the terminal. You can start a command in the background by adding an ampersand (&) at the end of the command. For example, to run a script in the background, you can use the command:
./myscript.sh &
This command starts the myscript.sh script in the background, and returns you to the command prompt immediately. You can then continue working in the terminal, while the script runs in the background.
To monitor the status of background jobs, you can use the jobs command. This command lists all the jobs running in the background, along with their job numbers. You can then use the fg command followed by the job number to bring a job to the foreground. For example, to bring job number 1 to the foreground, use the command:
fg %1
This command brings job number 1 to the foreground, allowing you to interact with it as if it were running in the foreground all along.
Using Pipes and Redirection
Pipes and redirection are powerful tools for manipulating the output of commands. In addition to using the |, >, and < symbols, you can also use the tee command to redirect output to a file and the terminal at the same time. For example, to save the output of a command to a file and display it on the terminal, use the command:
ls -l | tee myfile.txt
This command saves the output of the ls -l command to the file myfile.txt and displays it on the terminal at the same time.
You can also use redirection to read input from a file. For example, to pass the contents of a file as input to a command, use the command:
command < inputfile.txt
This command runs the command with the contents of inputfile.txt as input.
Navigating Your Command History
Navigating your command history can save you a lot of time and effort, especially if you frequently run similar commands. In addition to using the up and down arrow keys, you can also use the !! command to repeat the last command, and the !$ command to reuse the last argument of the previous command.
You can also search your command history using the Ctrl + R keyboard shortcut. This shortcut brings up the reverse-i-search prompt, which allows you to search for a command by typing a keyword. Press Enter to run the most recent command that matches the keyword.
Using SSH to Connect to Remote Servers

When using SSH to connect to a remote server, you can also use SSH tunneling to forward ports from the remote server to your local machine. For example, to forward port 8080 from the remote server to port 8080 on your local machine, use the command:
ssh -L 8080:localhost:8080 username@remotehost
This command logs you into the remote server and sets up a tunnel between port 8080 on the remote server and port 8080 on your local machine. You can then access the remote server's port 8080 by opening a web browser on your local machine and navigating to http://localhost:8080.
Using Screen and Tmux for Terminal Multiplexing

The screen command allows you to create multiple terminal sessions within a single SSH connection. This can be useful for remote administration, as it allows you to keep multiple terminal sessions open and switch between them without opening new SSH connections.
To start a new screen session, use the command:
screen
This command starts a new screen session, and displays a welcome message.
To detach from a screen session, use the keyboard shortcut Ctrl + A followed by the D key. This will return you to the shell prompt, but leave the screen session running in the background.
To reattach to a detached screen session, use the command:
screen -r
This command reattaches to the most recently detached screen session.
In addition to Screen and Tmux, you can also use Byobu, a terminal multiplexer that provides additional features such as session sharing, window renaming, and split-screen support. Byobu is a wrapper around Screen or Tmux, and provides an easy-to-use interface for managing multiple terminal sessions.
To install Byobu on Ubuntu, use the command:
sudo apt-get install byobu
To start a Byobu session, use the command:
byobu
This command starts a new Byobu session, which is similar to a Screen or Tmux session. By default, the terminal is split into two panes, with one pane displaying a shell prompt and the other pane displaying system information.
You can use keyboard shortcuts to create new windows, switch between windows, and split or resize panes. For example, to create a new window, use the Ctrl + A followed by the C keyboard shortcut. To switch to the next window, use the Ctrl + A followed by the N keyboard shortcut. To split a pane horizontally, use the Ctrl + A followed by the % keyboard shortcut.
Byobu provides many additional features, such as automatic window renaming, session sharing, and keybindings for common tasks. You can customize Byobu by editing the ~/.byobu/.tmux.conf or ~/.byobu/.screenrc files.
Using Bash Scripting for Automation
In addition to creating simple Bash scripts, you can also create more complex scripts that use loops, conditionals, and functions. For example, you can create a script that backups up multiple directories at once:
#!/bin/bash
for dir in /home/user1 /home/user2 /var/www
do
  tar -czvf ${dir##*/}.tar.gz $dir
done
This script uses a for loop to backup three directories: /home/user1, /home/user2, and /var/www. The ${dir##*/} syntax extracts the directory name from the full path, and uses it as the filename for the backup file.
You can also use command-line arguments to make your scripts more flexible. For example, you can create a script that accepts a directory name as an argument, and then creates a backup file of that directory:
#!/bin/bash
if [ -d "$1" ]
then
  tar -czvf ${1##*/}.tar.gz $1
else
  echo "Usage: backup.sh [directory]"
fi
This script checks if the first argument is a directory, and if so, creates a backup file using the same method as before. If the argument is not a directory, it displays a usage message.
Using SSH Keys for Passwordless Logins
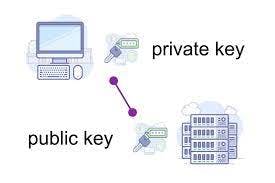
In addition to using SSH keys for passwordless logins, you can also use SSH keys to authenticate to Git repositories, remote databases, and other services. To add an SSH key to your Git account, for example, you can follow these steps:
Generate a new SSH key pair using the
ssh-keygencommand.Copy the public key to your Git account by following the instructions on the Git provider's website.
Test the connection by cloning a Git repository using the
git clonecommand.
Using SSH keys is more secure than using passwords, as it eliminates the risk of password theft or interception. You should always protect your private SSH key by keeping it in a safe place, and not sharing it with anyone.
Using Environment Variables
Environment variables are variables that are set in the shell environment, and can be used to store information such as paths, configuration options, and user preferences. Some commonly used environment variables include:
PATH: A list of directories that the shell searches for executable files.HOME: The path to the user's home directory.EDITOR: The default text editor used by the shell.PS1: The prompt string used by the shell.
You can set environment variables using the export command. For example, to add a new directory to your PATH variable, use the command:
export PATH=$PATH:/path/to/new/directory
This command adds the /path/to/new/directory directory to the end of the PATH variable, so that the shell can find executable files in that directory.
Using Regular Expressions
Regular expressions are patterns that can be used to match and manipulate text. Regular expressions are supported by many Linux utilities, such as grep, sed, and awk, and can be used to search for patterns in files, extract specific parts of text, and perform string replacements.
Some commonly used regular expression operators include:
.: Matches any character.*: Matches zero or more occurrences of the preceding character.+: Matches one or more occurrences of the preceding character.[]: Matches any character inside the square brackets.^: Matches the beginning of a line.$: Matches the end of a line.
For example, to search for all lines in all files in the current directory that contain the word "error", use the command:
grep "error" *
The asterisk (*) tells the grep command to search for the word "error" in all files in the current directory, and displays them on the terminal.
Using Shell Scripts for System Administration
Shell scripts can be used for system administration tasks such as backups, software installations, and system maintenance. By automating these tasks, you can save time and reduce the risk of errors caused by manual intervention.
Some commonly used shell scripts for system administration include:
Backup scripts: These scripts automate the process of backing up files and databases, and can be scheduled to run at regular intervals using a cron job.
Install scripts: These scripts automate the process of installing and configuring software packages, and can be customized to fit the specific needs of your system.
Maintenance scripts: These scripts perform routine maintenance tasks such as cleaning up log files, deleting temporary files, and optimizing database tables.
When creating shell scripts for system administration tasks, it's important to test them thoroughly before running them in a production environment. You should also keep a backup of your system and data, in case anything goes wrong.
Using awk for Text Processing

The awk command is a powerful text processing tool that allows you to extract and manipulate text data in files and streams. awk uses a scripting language that includes variables, conditionals, loops, and built-in functions to perform a wide range of text processing tasks.
For example, to extract the second column of a file that is separated by whitespace, use the command:
awk '{print $2}' myfile.txt
This command prints the second column of myfile.txt to the terminal.
You can also use awk to perform calculations and filtering on text data. For example, to calculate the total file size of all .txt files in a directory, use the command:
ls -l | awk '/\.txt$/ {sum += $5} END {print sum}'
This command lists the files in the current directory (ls -l), and uses awk to filter for .txt files and sum their sizes.
Using cron for Scheduled Tasks

The cron command allows you to schedule tasks to run at specific times and intervals. cron uses a configuration file called crontab to define the scheduled tasks and their frequency.
To edit your crontab file, use the command:
crontab -e
This command opens your crontab file in your default text editor.
The crontab file uses a specific syntax to define the schedule and command for each task. For example, to schedule a backup task to run every day at midnight, use the following line in your crontab file:
0 0 * * * /path/to/backup-script.sh
This line runs the backup-script.sh script located at /path/to/backup-script.sh every day at midnight.
Using rsync for File Synchronization
The rsync command allows you to synchronize files and directories between different systems, both locally and remotely. rsync uses a delta-transfer algorithm that only transfers the parts of files that have changed, which makes it much faster and more efficient than traditional file copy methods.
For example, to synchronize a directory called mydata between two systems using rsync, use the command:
rsync -avz /path/to/mydata user@remotehost:/path/to/mydata
This command synchronizes the local mydata directory to the remote mydata directory on the remotehost system.
You can also use rsync to exclude files and directories from the synchronization process, and to preserve file permissions, ownership, and timestamps.
Using journalctl for System Logging
The journalctl command allows you to view and manage the system logs generated by the systemd system and service manager. journalctl provides a powerful and flexible interface for searching, filtering, and analyzing system logs.
For example, to view the last 50 log entries generated by the sshd service, use the command:
journalctl -u sshd -n 50
This command shows the last 50 log entries generated by the sshd service.
You can also use journalctl to filter logs based on various criteria, such as time range, severity level, and source unit.
Using scp for Secure File Copy
The scp command allows you to securely copy files between systems using the SSH protocol. scp encrypts the data during transmission, which makes it a secure alternative to traditional file copy methods.
For example, to copy a file called myfile.txt from a local system to a remote system using scp, use the command:
scp myfile.txt user@remotehost:/path/to/destination
This command copies the myfile.txt file to the /path/to/destination directory on the remotehost system.
You can also use scp to copy directories and to specify custom SSH keys and ports.
Using sed for Text Transformations
The sed command allows you to perform complex text transformations on files and streams. sed uses a scripting language that includes regular expressions, variables, conditionals, and built-in functions to perform a wide range of text transformations.
For example, to replace all occurrences of the word "apple" with the word "orange" in a file called myfile.txt, use the command:
sed 's/apple/orange/g' myfile.txt
This command replaces all occurrences of the word "apple" with the word "orange" in myfile.txt.
You can also use sed to perform more complex text transformations, such as filtering lines based on patterns, deleting lines, and appending text.
Using netstat for Network Monitoring
The netstat command allows you to view and monitor network connections and statistics. netstat provides a powerful and flexible interface for analyzing network traffic, identifying network issues, and troubleshooting network problems.
For example, to view a list of active network connections on a system, use the command:
netstat -a
This command shows a list of all active network connections, including their protocol, source and destination IP addresses and ports, and connection status.
You can also use netstat to view network statistics, filter connections based on criteria, and display connection information in various formats.
Using htop for Process Monitoring
The htop command is an interactive process monitoring tool that provides a real-time view of system processes and resource usage. htop displays a color-coded list of processes, sorted by various criteria such as CPU usage, memory usage, and process priority.
For example, to view a list of all running processes sorted by CPU usage using htop, use the command:
htop
This command starts the htop process monitor and displays a real-time view of system processes and resource usage.
You can also use htop to view process details, filter processes based on criteria, and customize the display using various options.
Using Third-Party Tools for Terminal Productivity
In addition to the built-in Linux utilities, there are many third-party tools available that can enhance your terminal productivity. Some of these tools include:
fzf:
fzfis a command-line fuzzy finder that can be used to search through files, directories, and even command history with ease. It provides an interactive interface for searching and selecting from a list of options that match a given search query.Some common use cases of
fzfinclude:Searching for a file or directory in the current directory or subdirectories:
ls | fzfSearching for a file in a specific directory:
find /path/to/directory -type f | fzfSearching for a process to kill:
ps aux | fzf | awk '{print $2}' | xargs killSearching for a command from history to rerun:
history | fzf | awk '{print $2}' | xargs -I {} sh -c "{}"
fzf can be installed on Unix-based systems using package managers such as apt on Ubuntu or brew on macOS, or it can be compiled from source on any system. Once installed, you can start using fzf in your terminal by piping output from other commands into it, or by binding it to a key shortcut in your shell.
ripgrep:
ripgrepis a command-line tool that is used to search for text in files and directories. It is designed to be fast, efficient, and easy to use, and is an alternative to other popular tools such asgrepandack.Some of the main features of
ripgrepinclude:High-performance searching:
ripgrepis optimized for speed and can search through large files and directories quickly.Recursive searching:
ripgrepcan search through directories and subdirectories recursively by default.Support for regular expressions:
ripgrepcan search for text using regular expressions, making it a powerful tool for complex searching.Support for multiple file types:
ripgrepcan search through files of different types, such as text files, source code files, and binary files.Built-in file filtering:
ripgrepcan filter files to be searched based on file extension or filename pattern.Colorful output:
ripgrephighlights the search matches in color to make them easier to find.
Here are some examples of how to use ripgrep:
Search for a string in a file:
rg "search_string" file.txtSearch for a string recursively in a directory:
rg "search_string" /path/to/directorySearch for a regular expression in a file:
rg "regex_pattern" file.txtSearch for a regular expression in a directory, excluding certain files:
rg "regex_pattern" /path/to/directory --exclude-file=pattern_to_excludeDisplay the context around search matches:
rg -C 3 "search_string" file.txt(displays 3 lines of context before and after each match)Display the line number of search matches:
rg -n "search_string" file.txt
ripgrep can be installed on Unix-based systems using package managers such as apt on Ubuntu or brew on macOS, or it can be compiled from source on any system. Once installed, you can start using ripgrep in your terminal by running the rg command followed by your search query and file or directory to search in.
tig:
tigis a command-line tool that provides a text-based interface for interacting with Git repositories. It allows users to browse through the history of a Git repository, view commit details, and perform common Git operations such as merging and cherry-picking.Some of the main features of
tiginclude:Interactive browsing:
tigprovides an interactive interface for browsing through a Git repository, allowing users to view the commit history, files, and changes made to each commit.Powerful searching:
tigallows users to search through the commit history and changes using regular expressions, making it easy to find specific commits or changes.Visual diffing:
tigprovides a visual diffing tool that allows users to compare changes between different versions of a file or commit.Branch and tag management:
tigallows users to view and manage branches and tags within a Git repository, including merging and cherry-picking commits between branches.Commit editing:
tigallows users to edit commit messages and change the contents of a commit using the built-in commit editor.
Here are some examples of how to use tig:
Open the
tiginterface for the current Git repository:tigBrowse through the commit history: use the up and down arrow keys to move between commits, and press enter to view commit details.
Search for a specific commit: press the "/" key to enter search mode, and then enter your search query.
View changes in a commit: press "c" to view the changes made in a commit, and use the left and right arrow keys to move between files.
Merge changes from one branch to another: select the commit you want to merge, and then press "m" to merge it into the current branch.
tig can be installed on Unix-based systems using package managers such as apt on Ubuntu or brew on macOS, or it can be compiled from source on any system. Once installed, you can start using tig in your terminal by running the tig command in a Git repository.

Thank you for reading this Blog. Hope you learned something new today! If you found this blog helpful, please like, share, and follow me for more blog posts like this in the future.
If you have some suggestions I am happy to learn with you.
I would love to connect with you on LinkedIn
Meet you in the next blog....till then Stay Safe ➕ Stay Healthy
#HappyLearning #Linux #LinuxForDevelopment #LinuxTerminal #CommandLine #Unix #Bash #ShellScripting #TerminalTricks #TerminalShortcuts #LinuxTips #LinuxTricks #LinuxCommands #TerminalProductivity #RemoteTerminal #Byobu #SSH #TextProcessing #FileManagement #Networking #ProcessMonitoring #SysAdmin #DeveloperTips #OpenSource #TechTips #TechBlogs #devops