Kubernetes Workloads: Deployments, StatefulSets, DaemonSets, Jobs, and CronJobs

Introduction
Kubernetes is an open-source container orchestration system that automates the deployment, scaling, and management of containerized applications. Kubernetes workloads are the building blocks of applications that can be deployed on a Kubernetes cluster. In this comprehensive guide, we will cover the different types of Kubernetes workloads and provide advanced code examples for each workload.
Deployments

Deployments are the most common Kubernetes workload used to manage stateless applications. A stateless application is one that does not maintain any state, such as a web server that serves static content or a load balancer that routes traffic. They provide a way to manage the deployment of containers and ensure that the containers are running and healthy. Deployments also provide features for scaling and updating applications.
Let's create an example Deployment for a simple web application.
Create a file named webapp-deployment.yaml with the following content:
apiVersion: apps/v1
kind: Deployment
metadata:
  name: webapp-deployment
spec:
  replicas: 2
  selector:
    matchLabels:
      app: webapp
  template:
    metadata:
      labels:
        app: webapp
    spec:
      containers:
      - name: webapp
        image: nginx
        ports:
        - containerPort: 80
The above YAML file creates a Deployment named webapp-deployment with two replicas. It also specifies a selector that matches the label app: webapp. The template section defines the Pod template used to create new Pods when scaling the application. In this case, it creates a single container based on the nginx image, and it exposes port 80.
Now let's deploy this Deployment on a Kubernetes cluster. Run the following command to create the Deployment:
kubectl apply -f webapp-deployment.yaml
This will create the Deployment with two replicas. You can check the status of the Deployment by running:
kubectl get deployments
This will output the following:

You can also check the status of the Pods created by the Deployment by running:
kubectl get pods --selector=app=webapp
This will output the following:

You can see that two Pods have been created by the Deployment.
StatefulSets
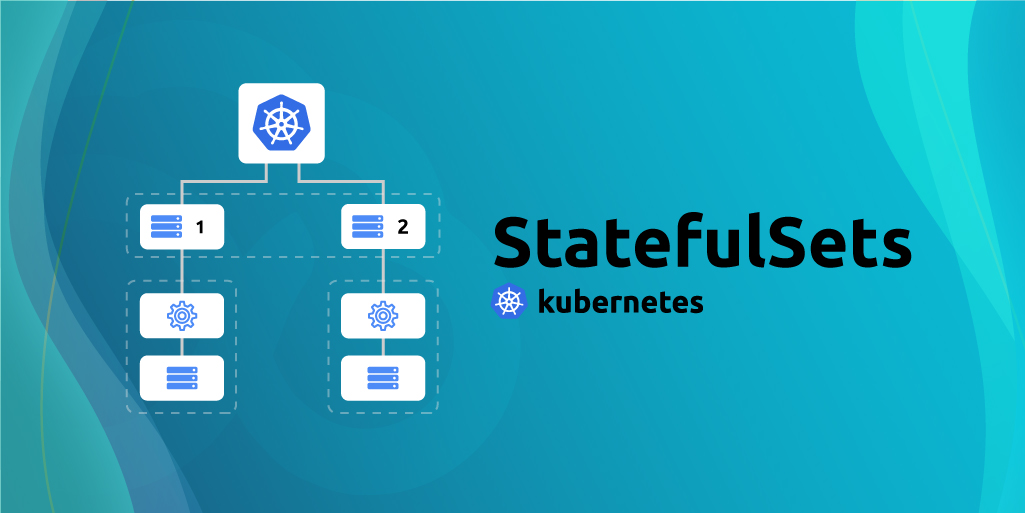
StatefulSets are used to manage stateful applications that require unique identities and persistent storage. A stateful application is one that maintains state, such as a database or a caching server. Examples of stateful applications include databases, message queues, and file systems. StatefulSets provide a way to manage the lifecycle of stateful applications and ensure that each instance has a unique identity and persistent storage like ordering and uniqueness of Pods, which is important for stateful applications.
Creating a StatefulSet
Let's create an example StatefulSet for a simple MySQL database.
Create a file named mysql-statefulset.yaml with the following content:
apiVersion: apps/v1
kind: StatefulSet
metadata:
  name: mysql-statefulset
spec:
  replicas: 1
  selector:
    matchLabels:
      app: mysql
  serviceName: mysql-service
  template:
    metadata:
      labels:
        app: mysql
    spec:
      containers:
      - name: mysql
        image: mysql:5.7
        env:
        - name: MYSQL_ROOT_PASSWORD
          value: mysecretpassword
        volumeMounts:
        - name: mysql-data
          mountPath: /var/lib/mysql
  volumeClaimTemplates:
  - metadata:
      name: mysql-data
    spec:
      accessModes: ["ReadWriteOnce"]
      resources:
        requests:
          storage: 1Gi
The above YAML file creates a StatefulSet named mysql-statefulset with a single replica. It also specifies a selector that matches the label app: mysql. The serviceName field is set to mysql-service, which will be used to create a headless service for the StatefulSet.
The template section defines the Pod template used to create new Pods when scaling the StatefulSet. In this case, it creates a single container based on the mysql:5.7 image, and sets the environment variable MYSQL_ROOT_PASSWORD to mysecretpassword. The container also mounts a persistent volume named mysql-data to the path /var/lib/mysql, which will be used to store the database files.
The volumeClaimTemplates section defines a PersistentVolumeClaim (PVC) template that will be used to create a PVC for each Pod created by the StatefulSet. In this case, it creates a PVC named mysql-data with a request for 1GB of storage with access mode ReadWriteOnce.
Now let's deploy this StatefulSet on a Kubernetes cluster. Run the following command to create the StatefulSet:
kubectl apply -f mysql-statefulset.yaml
This will create the StatefulSet with a single replica. You can check the status of the StatefulSet by running:
kubectl get statefulsets
This will output the following:

You can also check the status of the Pods created by the StatefulSet by running:
kubectl get pods --selector=app=mysql
This will output the following:

You can see that a single Pod has been created by the StatefulSet. The Pod name has a suffix -0, which indicates that it is the first Pod created by the StatefulSet.
Scaling a StatefulSet
To scale the StatefulSet, we can update the replicas field in the StatefulSet YAML file and reapply it using the kubectl apply command. For example, if we want to scale the StatefulSet to three replicas, we can change the replicas field to 3 in the mysql-statefulset.yaml file and reapply it using the following command:
kubectl apply -f mysql-statefulset.yaml
This will scale the StatefulSet to three replicas. You can check the status of the StatefulSet by running:
kubectl get statefulsets
This will output the following:

You can also check the status of the Pods created by the StatefulSet by running:
kubectl get pods --selector=app=mysql
This will output the following:

You can see that three Pods have been created by the StatefulSet. The Pod names have suffixes -0, -1, and -2, which indicates the order in which they were created.
Updating a StatefulSet
To update a StatefulSet, we can update the template section in the StatefulSet YAML file and reapply it using the kubectl apply command. For example, if we want to update the MySQL image to version 8.0, we can change the image field in the template section to mysql:8.0 in the mysql-statefulset.yaml file and reapply it using the following command:
kubectl apply -f mysql-statefulset.yaml
This will update the StatefulSet to use the MySQL image version 8.0. You can check the status of the StatefulSet by running:
kubectl get statefulsets
This will output the following:

You can also check the status of the Pods created by the StatefulSet by running:
kubectl get pods --selector=app=mysql
This will output the following:

You can see that the StatefulSet is updating the Pods one by one. The Pod names have suffixes -0, -1, and -2, which indicates the order in which they were created. The Pod with suffix -0 is in the process of being updated.
Deleting a StatefulSet
To delete a StatefulSet, we can use the kubectl delete command with the StatefulSet resource type and the name of the StatefulSet. For example, to delete the mysql-statefulset StatefulSet, we can run the following command:
kubectl delete statefulset mysql-statefulset
This will delete the StatefulSet and all the associated Pods, but it will not delete the PVCs. To delete the PVCs as well, we can add the --cascade flag to the kubectl delete command:
kubectl delete statefulset mysql-statefulset --cascade
This will delete the StatefulSet and all the associated Pods and PVCs.
DaemonSets
DaemonSets are used to manage system daemons that need to run on all or some of the nodes in a Kubernetes cluster. A daemon process is a long-running process that performs a specific task, such as a logging agent or a monitoring agent. DaemonSets ensure that each node in the cluster has a copy of the daemon process running.. Examples of daemons include log collectors, monitoring agents, and network proxies. DaemonSets ensure that a copy of the Pod runs on each node in the cluster that matches a set of labels.
Creating a DaemonSet
Let's create an example DaemonSet for a simple log collector that collects logs from all the nodes in the cluster.
Create a file named log-collector-daemonset.yaml with the following content:
apiVersion: apps/v1
kind: DaemonSet
metadata:
  name: log-collector-daemonset
spec:
  selector:
    matchLabels:
      app: log-collector
  template:
    metadata:
      labels:
        app: log-collector
    spec:
      containers:
      - name: log-collector
        image: fluentd
        volumeMounts:
        - name: varlog
          mountPath: /var/log
        - name: varlibdockercontainers
          mountPath: /var/lib/docker/containers
          readOnly: true
      volumes:
      - name: varlog
        hostPath:
          path: /var/log
      - name: varlibdockercontainers
        hostPath:
          path: /var/lib/docker/containers
The above YAML file creates a DaemonSet named log-collector-daemonset. The selector field specifies that the DaemonSet should match the label app: log-collector. The template section defines the Pod template used to create new Pods on each node in the cluster that matches the label. In this case, it creates a single container based on the fluentd image, which is a popular log collector.
The container mounts two volumes - /var/log and /var/lib/docker/containers. The /var/log volume is mounted as a hostPath volume, which allows the container to read the logs from the host's /var/log directory. The /var/lib/docker/containers volume is mounted as a hostPath volume with the readOnly option set to true, which allows the container to read the logs from the host's /var/lib/docker/containers directory.
Now let's deploy this DaemonSet on a Kubernetes cluster. Run the following command to create the DaemonSet:
kubectl apply -f log-collector-daemonset.yaml
This will create a Pod on each node in the cluster that matches the label app: log-collector. You can check the status of the DaemonSet by running:
kubectl get daemonsets
This will output the following:

You can also check the status of the Pods created by the DaemonSet by running:
kubectl get pods --selector=app=log-collector
This will output a list of Pods running on each node in the cluster that matches the label.
Updating a DaemonSet
To update a DaemonSet, we can update the template section in the DaemonSet YAML file and reapply it using the kubectl apply command. For example, if we want to update the log collector to use the latest version of the fluentd image, we can change the image field in the template section to fluentd:latest in the log-collector-daemonset.yaml file and reapply it using the following command:
kubectl apply -f log-collector-daemonset.yaml
This will update the DaemonSet to use the latest version of the fluentd image. You can check the status of the DaemonSet by running:
kubectl get daemonsets
This will output the following:

You can also check the status of the Pods created by the DaemonSet by running:
kubectl get pods --selector=app=log-collector
This will output a list of Pods running on each node in the cluster that matches the label.
Deleting a DaemonSet
To delete a DaemonSet, we can use the kubectl delete command with the DaemonSet resource type and the name of the DaemonSet. For example, to delete the log-collector-daemonset DaemonSet, we can run the following command:
kubectl delete daemonset log-collector-daemonset
This will delete the DaemonSet and all the associated Pods.
Jobs

Jobs are used to manage the execution of a short-lived task or batch job, such as running a database migration or performing a backup. Jobs are used to run one-off tasks to completion, such as batch processing jobs, data migrations, and backups. Jobs ensure that a specified number of Pods successfully complete before terminating or that the task is completed successfully and can be run on demand or on a schedule.
Creating a Job
Let's create an example Job for a simple data migration task.
Create a file named data-migration-job.yaml with the following content:
apiVersion: batch/v1
kind: Job
metadata:
  name: data-migration-job
spec:
  completions: 1
  template:
    spec:
      containers:
      - name: data-migration
        image: busybox
        command: ["sh", "-c", "echo 'Migrating data'; sleep 30"]
      restartPolicy: Never
The above YAML file creates a Job named data-migration-job. The completions field specifies that the Job should complete successfully once. The template section defines the Pod template used to create a single Pod for the Job. In this case, it creates a single container based on the busybox image, which is a lightweight image that includes common Unix utilities.
The container runs a simple command that echoes a message and sleeps for 30 seconds. This simulates a data migration task that takes some time to complete.
Now let's run this Job on a Kubernetes cluster. Run the following command to create the Job:
kubectl apply -f data-migration-job.yaml
This will create a single Pod for the Job, which will run the data migration task. You can check the status of the Job by running:
kubectl get jobs
This will output the following:

You can see that the Job has completed successfully. You can also check the status of the Pods created by the Job by running:
kubectl get pods --selector=job-name=data-migration-job
This will output the following:

You can see that the Pod created by the Job has completed successfully.
Parallel Jobs
Jobs can also be used to run tasks in parallel. To run a parallel Job, we can specify the parallelism field in the Job YAML file.
Let's create an example Job for a simple parallel data migration task.
Create a file named parallel-data-migration-job.yaml with the following content:
apiVersion: batch/v1
kind: Job
metadata:
  name: parallel-data-migration-job
spec:
  completions: 3
  parallelism: 3
  template:
    spec:
      containers:
      - name: data-migration
        image: busybox
        command: ["sh", "-c", "echo 'Migrating data'; sleep 30"]
      restartPolicy: Never
The above YAML file creates a Job named parallel-data-migration-job. The completions field specifies that the Job should complete successfully once for each Pod created by the Job. The parallelism field specifies that the Job should create three Pods in parallel. The template section defines the Pod template used to create each Pod for the Job. In this case, it creates a single container based on the busybox image, which runs the same command as in the previous example.
Now let's run this Job on a Kubernetes cluster. Run the following command to create the Job:
kubectl apply -f parallel-data-migration-job.yaml
This will create three Pods for the Job, which will run the data migration task in parallel. You can check the status of the Job by running:
kubectl get jobs
This will output the following:

You can see that the Job has completed successfully for all three Pods. You can also check the status of the Pods created by the Job by running:
kubectl get pods --selector=job-name=parallel-data-migration-job
This will output a list of Pods created by the Job.
CronJobs
CronJobs are used to run Jobs on a periodic schedule, similar to the Unix cron utility. CronJobs ensure that a specified number of Pods successfully complete each time they run or that the task is executed at the specified time and can be used for tasks such as backups, database cleanup, or sending reports.
Creating a CronJob
Let's create an example CronJob for a simple backup task that runs every day at 12:00 PM.
Create a file named daily-backup-cronjob.yaml with the following content:
apiVersion: batch/v1beta1
kind: CronJob
metadata:
  name: daily-backup-cronjob
spec:
  schedule: "0 12 * * *"
  jobTemplate:
    spec:
      template:
        spec:
          containers:
          - name: backup
            image: busybox
            command: ["sh", "-c", "echo 'Backing up data'; sleep 30"]
          restartPolicy: Never
The above YAML file creates a CronJob named daily-backup-cronjob. The schedule field specifies that the CronJob should run every day at 12:00 PM. The jobTemplate section defines the Job template used to create a single Pod for the Job. In this case, it creates a single container based on the busybox image, which runs the same command as in the previous example.
Now let's run this CronJob on a Kubernetes cluster. Run the following command to create the CronJob:
kubectl apply -f daily-backup-cronjob.yaml
This will create a CronJob that runs the backup task every day at 12:00 PM. You can check the status of the CronJob by running:
kubectl get cronjobs
This will output the following:

You can see that the CronJob has not yet run, because it is scheduled to run at 12:00 PM.
You can also check the status of the Jobs created by the CronJob by running:
kubectl get jobs --selector=job-name=daily-backup-cronjob-*
This will output a list of Jobs created by the CronJob.
Updating a CronJob
To update a CronJob, we can update the schedule field in the CronJob YAML file and reapply it using the kubectl apply command. For example, if we want to change the schedule to run the backup task every hour, we can change the schedule field to "0 * * * *" in the daily-backup-cronjob.yaml file and reapply it using the following command:
kubectl apply -f daily-backup-cronjob.yaml
This will update the CronJob to run the backup task every hour. You can check the status of the CronJob by running:
kubectl get cronjobs
This will output the following:

You can see that the CronJob has been updated to run the backup task every hour.
Deleting a CronJob
To delete a CronJob, we can use the kubectl delete command with the CronJob resource type and the name of the CronJob. For example, to delete the daily-backup-cronjob CronJob, we can run the following command:
kubectl delete cronjob daily-backup-cronjob
This will delete the CronJob and all the associated Jobs.
Conclusion
Deployments are used to manage stateless applications and ensure that a specified number of replicas are running at all times. StatefulSets are used to manage stateful applications that require stable network identities and persistent storage. DaemonSets are used to manage system daemons that need to run on all or some of the nodes in a Kubernetes cluster. Jobs are used to run one-off tasks to completion, such as batch processing jobs, data migrations, and backups. CronJobs are used to run Jobs on a periodic schedule, similar to the Unix cron utility.
Kubernetes workloads are a fundamental concept in Kubernetes, and understanding how to use them is essential for managing applications on a Kubernetes cluster. By following the examples in this blog post, you should have a solid understanding of how to create and manage Kubernetes workloads.

Thank you for reading this Blog. Hope you learned something new today! If you found this blog helpful, please like, share, and follow me for more blog posts like this in the future.
If you have some suggestions I am happy to learn with you.
I would love to connect with you on LinkedIn
Meet you in the next blog....till then Stay Safe ➕ Stay Healthy
#HappyLearning #Kubernetes #Deployments #StatefulSets #DaemonSets #Jobs #CronJobs #ContainerOrchestration #CloudNative #Microservices #Containerization #ClusterManagement #Scalability #Availability #FaultTolerance #devops #Kubeweek #KubeWeekChallenge #TrainWithShubham #KubeWeek_Challenge #kubeweek_day3


